This section allows you to manage the clustering service. The clustering service provides high availability for load balancing services through two collaborative nodes in active-passive mode.
A cluster is formed by 2 nodes working together to maintain load balancing services availability, and avoid any downtime of the services from a client’s point of view. Usually, there are master and backup roles in an active-passive mode; The master is the node that is currently managing the traffic to the backends and accepting all the connections from the clients, and the backup node knows all the configuration in real-time and is ready to launch the services if it detects that the master node is not responding properly.
Some requirements to take into account when creating a cluster:
Both nodes should be running the same Relianoid version (ie. same appliance model).
Both nodes should have different hostnames.
Both nodes should have the same NICs names (Network interfaces).
The master node must be the only node where the configuration happens, and it should never be done in the backup node.
There may be a need to configure intermediate switching and routing devices to avoid any kind of conflict with the cluster switching.
Setting a floating IP is always a good practice to avoid the service from experiencing any downtime due to a cluster switch.
When the load balancing services switch from one node to another, the backup node will take care of all the current connections and service status by itself to avoid the client from suffering any interruptions in the service.
Configure Cluster Service #
This is the main page where to configure the Cluster. The clustering is composed of several services including:
Synchronization. This service synchronizes the configuration made in the master node to the backup node automatically. So, every change made in the configuration is replicated to the backup node and lets it take control whenever it is required. This service uses inotify and rsync daemons through SSH to synchronize configuration files in real-time.
Heartbeat. This service permits checking the cluster nodes’ health status among all of them to detect quickly when a node is not correctly working. This service relies on the VRRP protocol over multicast designed to be lightweight and real-time communication. Relianoid 6 uses keepalive in order to provide this service.
Connection Tracking. This service permits real-time replicate connections and their state to allow the backup node to resume all the connections during a failover so that the clients and backend connections don’t detect any connection disruption. Thanks to the conntrack service.
Command Replication. This service permits sending and activating the configuration applied in the master node to the backup, but passively so that during a failover task, the backup takes control and will launch all the networks and farms, and resume the connections as soon as possible. This service is managed by zclustermanager through SSH.
The node where the Cluster is configured becomes the master node. Warning: Any previous configuration in the backup node will be erased. It means you will lose any Farms (including their certificates), Virtual Interfaces, IPDS rules, etc.
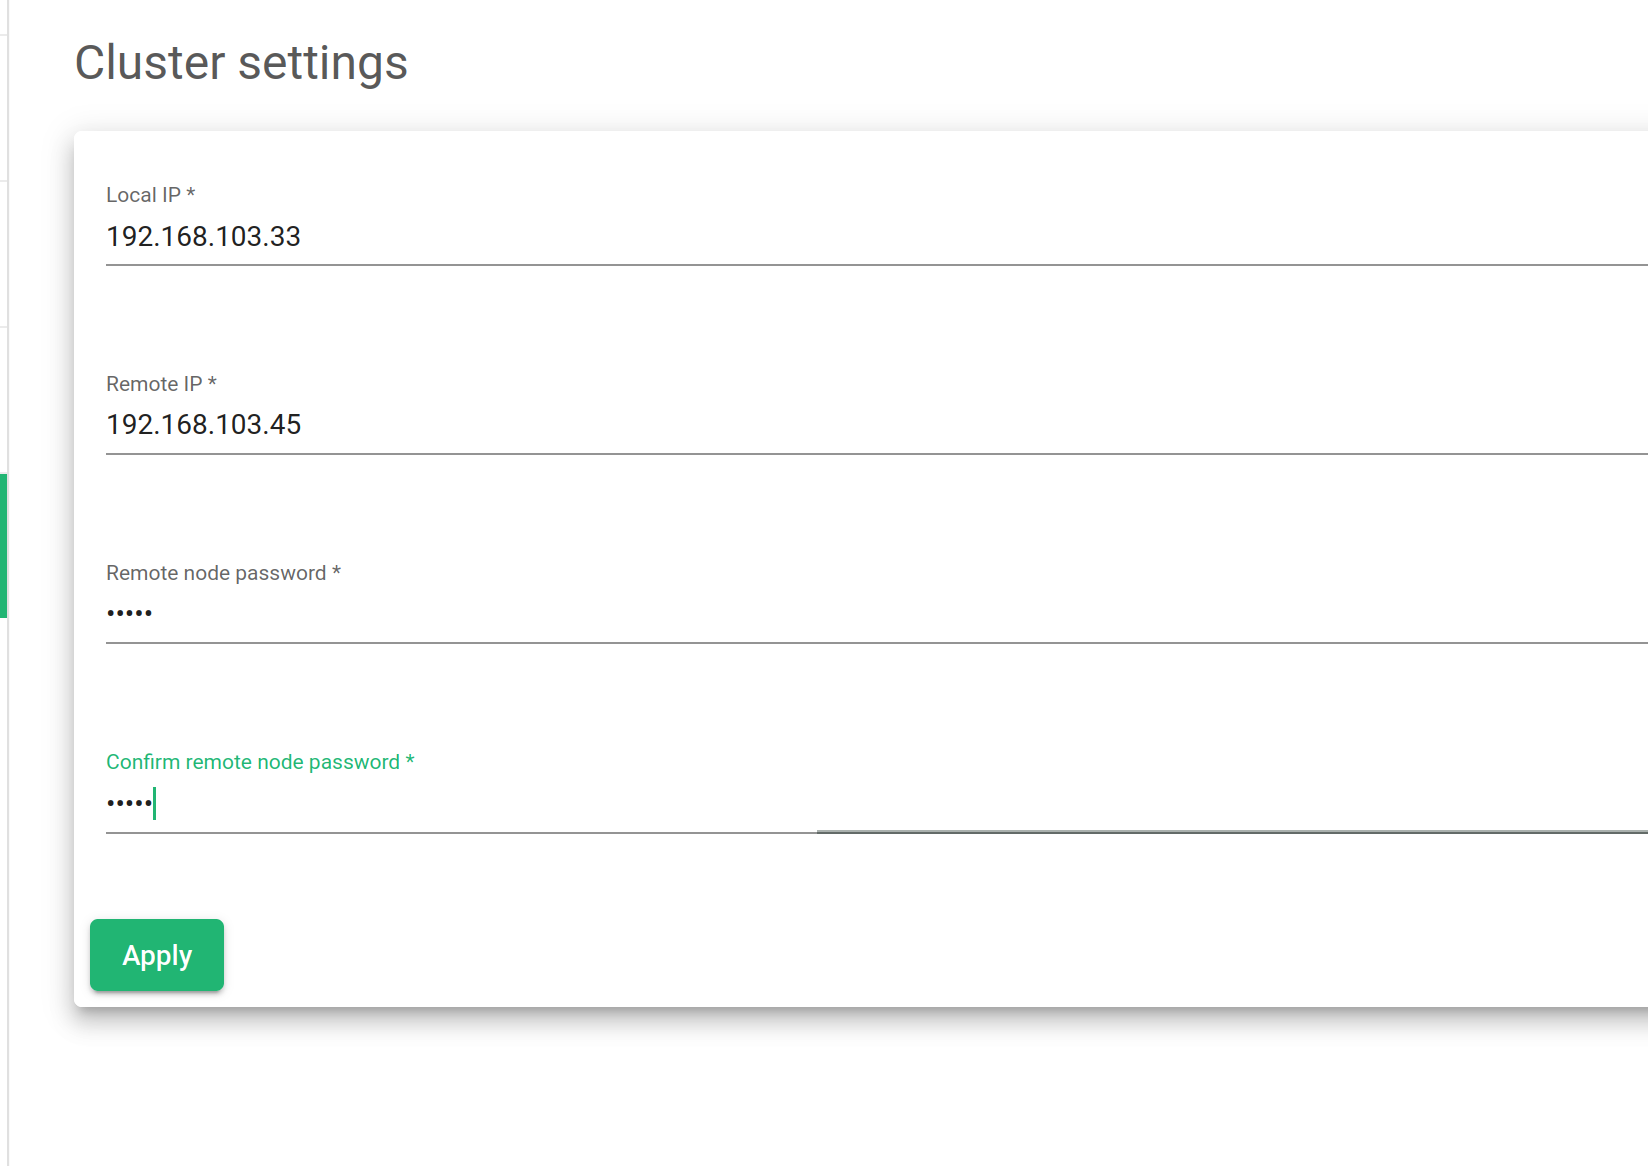
A new cluster configuration requires the following parameters to be created:
Local IP. Drop down with all the available network interfaces to be selected as the cluster management interface. No virtual interfaces are allowed.
Remote IP. Remote IP address of the node that will behave as the future backup node.
Remote node Password. The password of the root user of the remote (future backup) node.
Confirm remote node Password. Ensure that it’s the correct password by repeating the password.
After setting all the needed parameters, click on the Apply button.
Show Cluster Service #
If the cluster service is already configured and active, the cluster shows the following information about the services, backends, and actions.
Interface. Network interface where the cluster services have been configured.
Failback. If during a failover, the load balancing services should be returned to the master when it’s available again or maintain the current node as the new master. This option is useful when the backup node has fewer resources allocated than the master and the last should be the preferred master for the services.
Check Interval. Time checks that the heartbeat service will use to check the status between the nodes.
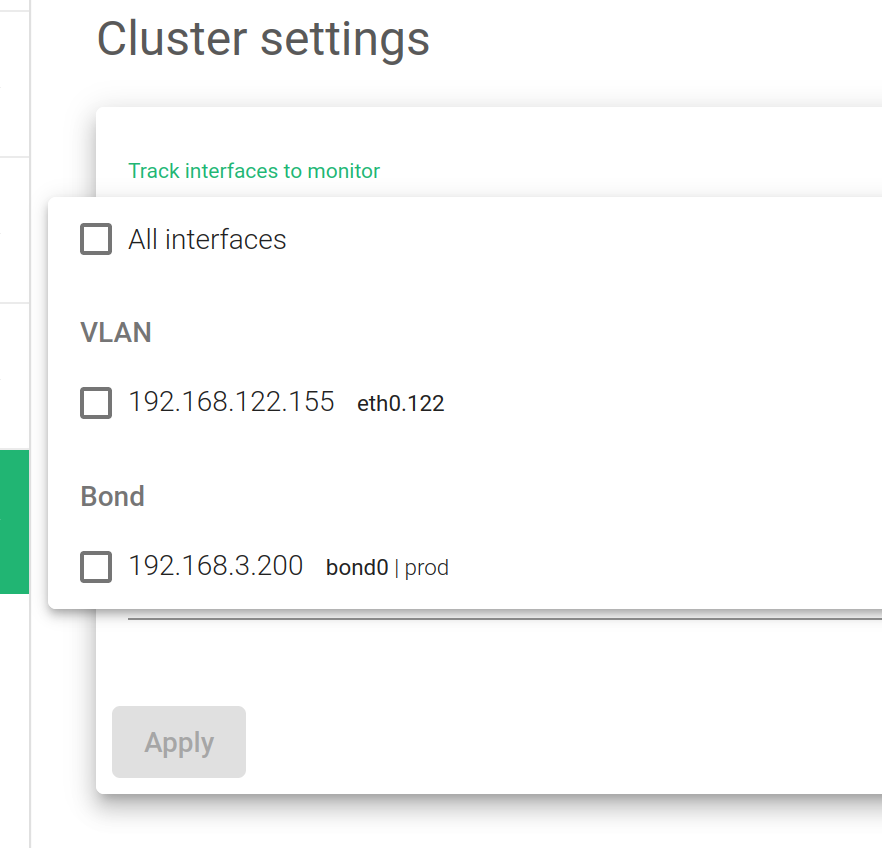
Tracked interfaces. Shows the active network interfaces that are being tracked in real-time.
Actions. Available actions to apply.
- Show Nodes. Show the table nodes and their status.
- Edit. Change some configuration settings for the nodes in a cluster.
- Destroy. Remove the configuration setting and remove a node.
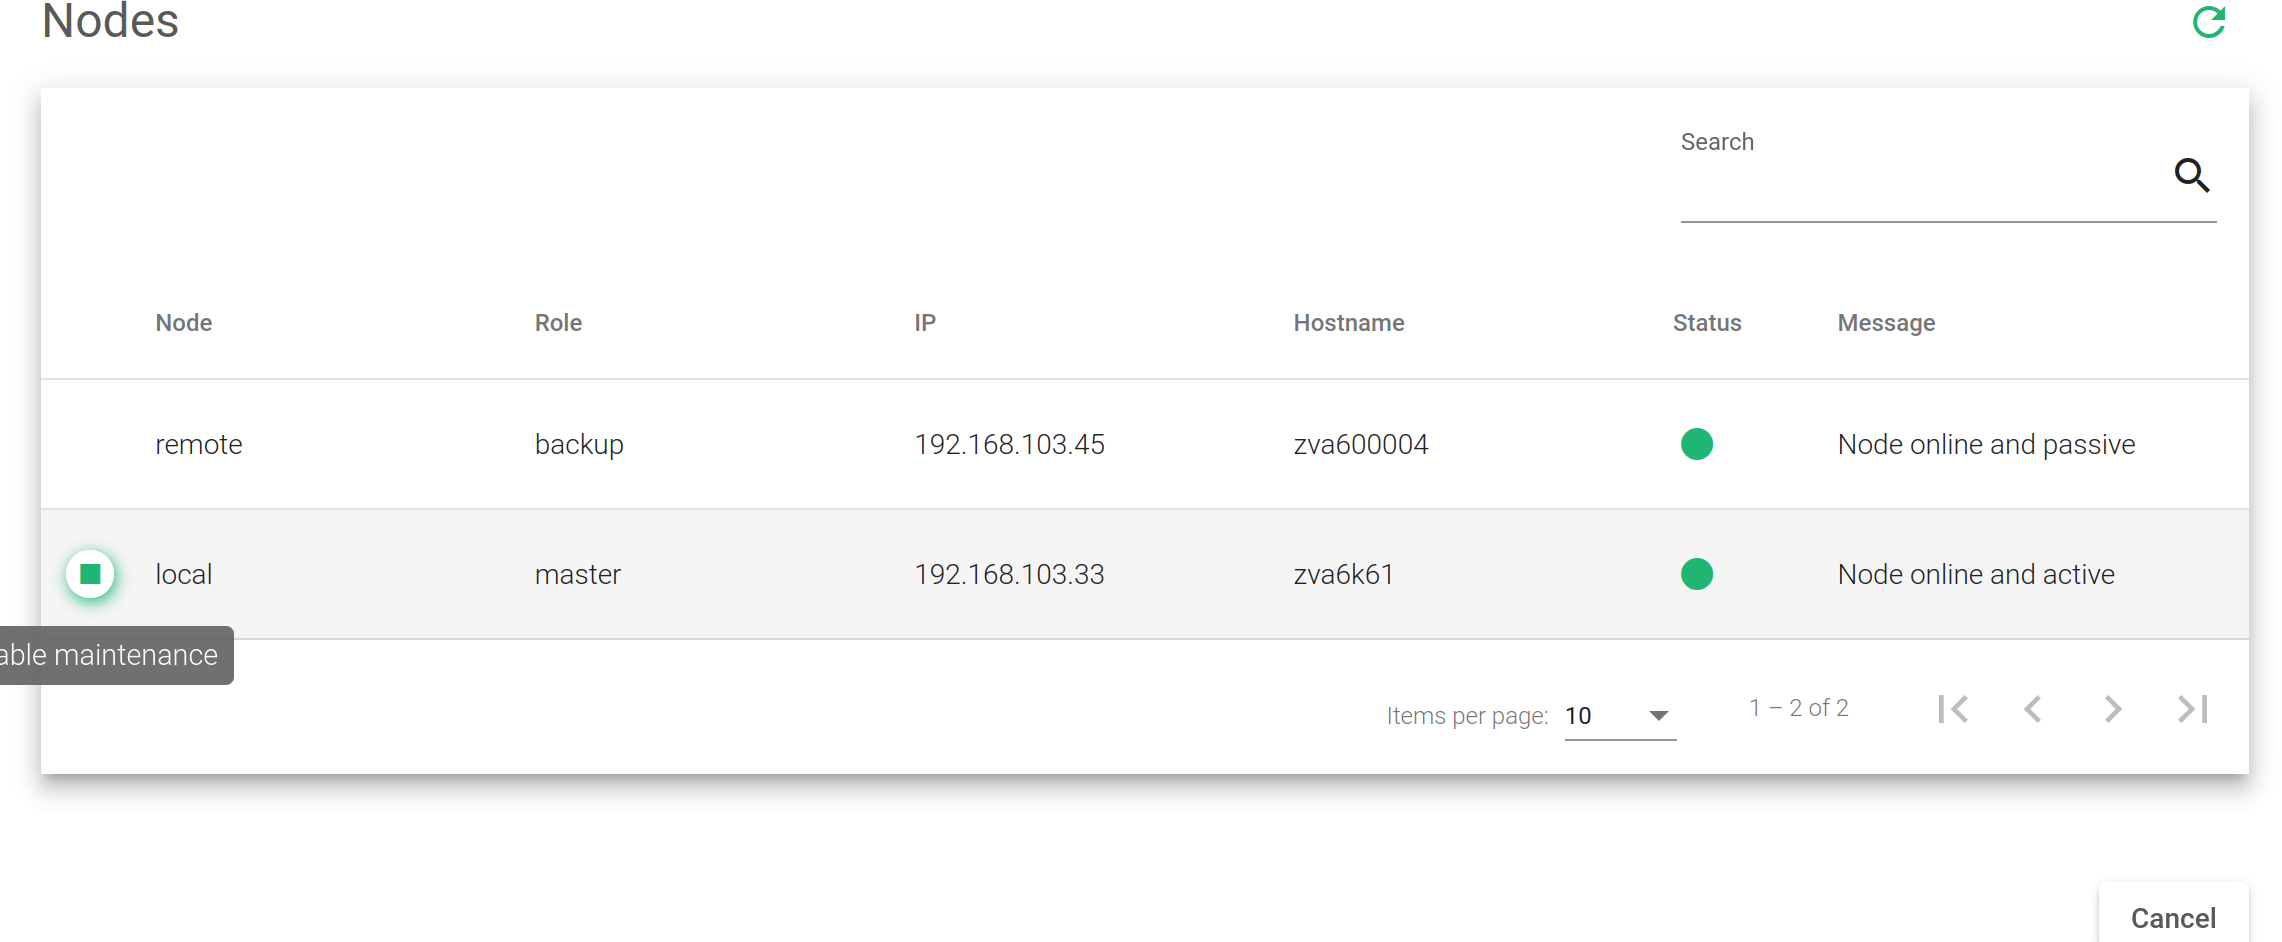
The Show Nodes action shows a table with:
Node. For every node of the cluster, show if it is local or remote. This will depend on the type of node you’ve connected through the web GUI. Local will be the node that you’re currently connected and remote is the other node.
Role. For every node of the cluster, show if it is a master backup (also known as slave), or maintenance if it is a temporarily disabled node. It’ll depend on the role that the node has in the cluster.
IP. The IP address of every node that compounds the cluster.
Hostname. The hostname of every node that compounds the cluster.
Status. The nodes status could be:
- Red. If there is any failure.
- Grey. If the node is unreachable.
- Orange. If it’s in maintenance mode.
- Green. if everything is right.
Message. The message from the remote node. It’s a debug message for every node in the cluster.
Actions. The actions available for every node are the following.
- Enable Maintenance. Put in maintenance mode. It temporarily disables a cluster node to perform maintenance tasks and avoid a failover.
Cluster configuration #
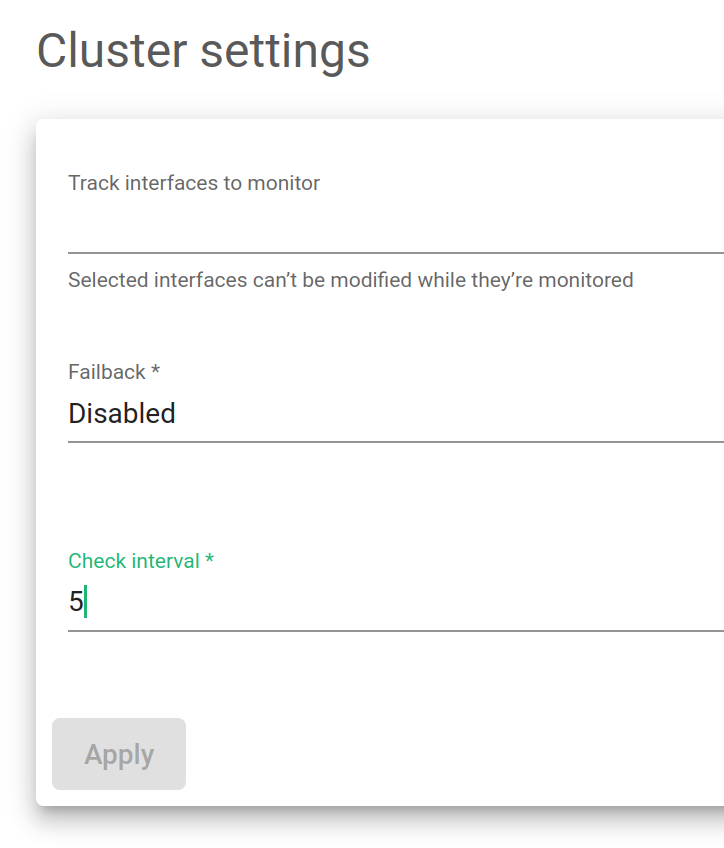
The global setting options available are described below.
Failback. Select which of the load balancers is preferred as the master.
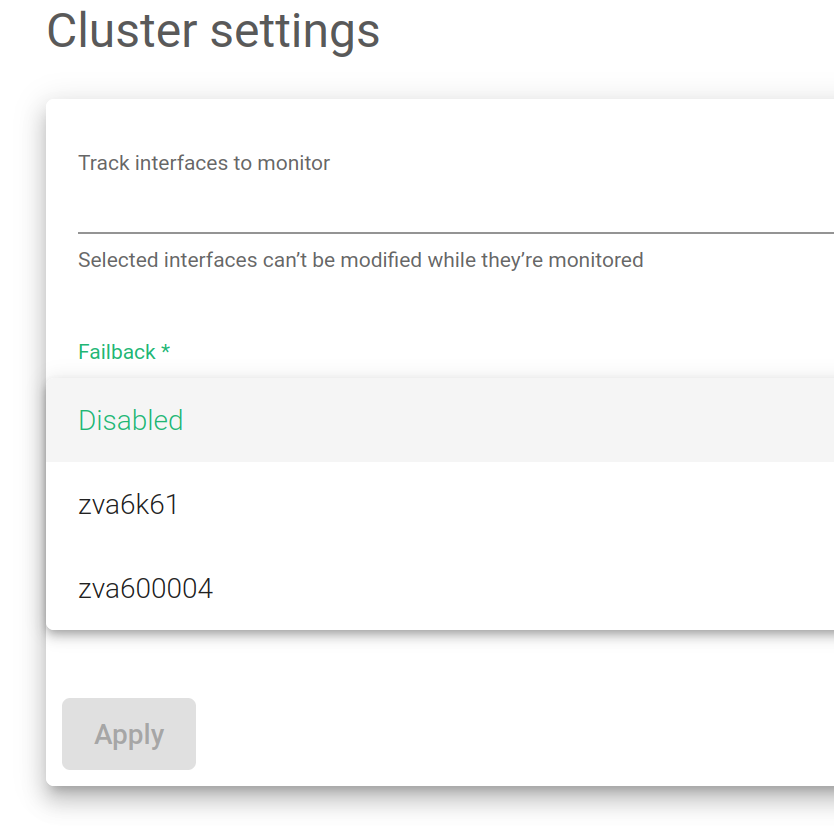
Track Interfaces to monitor. Gather information from specific interfaces in your lists. It could be LAN or a VLAN.
Check Interval. The time between each health check from the backend node to the master’s health.
Click on the Apply button in order to apply the changes.
