How Exchange 2016 works? #
Microsoft Exchange 2016 is part of the server applications from Microsoft that provides mailing services, mailbox, address book, client accesses, autodiscovery connectors among others.
For a standalone server, Microsoft Exchange 2016 uses the following networking ports:
TCP/25 and TCP/465 for SMTP and SMTPS mailing services, respectively.
TCP/143 and TCP/993 for IMAP and IMAPS client access services, respectively.
TCP/110 and TCP/995 for POP3 and POP3S client access services, respectively.
TCP/80 and TCP/443 for Outlook Web Access (OWA) client access services, autodiscovery services and MAPI services.
Within an organization, all these services in a standalone server is not a valid architecture as it doesn’t provide high availability service in the case of maintenance or if the service is down. For that reason, we propose an scalable architecture that provides high availability and avoids a single point of failure.
Microsoft Exchange 2016 scalable environment #
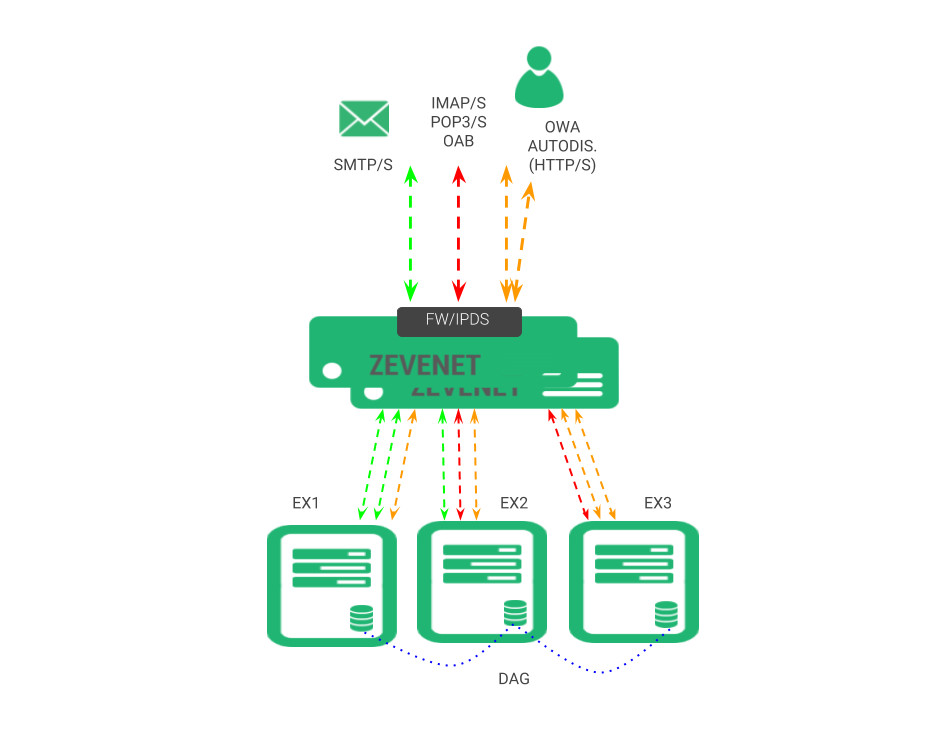
Below is shown the proposed environment to build Microsoft Exchange 2016 services in high availability with a flexible and scalable architecture.
With this architecture you can achieve isolated Exchange 2016 services to avoid one service to affect to another ones during maintenance or failure, by grouping mailing services from one side and client access services from another one. In addition, it offers the flexibility to configure dedicated backends for every service seamlessly.
Requirements #
Firstly, these configurations need to be addressed in the backend servers in order to convert it as a scalable service:
1. Create a service name. It is required to configure the virtual directories or namespace of Exchange 2016 to a service name avoiding the use of the hostname which is the default configuration (ex. exchange.mydomain.com ). The new namespace will be used in the CRT to the CA in order to generate a new secure certificate for the service. In addition, the selected namespace should be included in the corporate DNS in order to resolve to the virtual address of the farms that will be created in the load balancer.
2. MAPI service. Exchange2016 doesn’t use dinyamic ports anymore for this service, It is supported in HTTP and enabled by default, but don’t forget to configure this service properly, For specific steps on how to enable, configure and test MAPI over HTTP see https://technet.microsoft.com/en-us/library/mt634322(v=exchg.160).aspx.
3. Setup the DAG Service for database replication. Enabling the Database Availability Group (DAG) in the CAS Array will allow to create a clustering service replication of mailboxes between the servers.
4. Create the load balancing services. It will be explained below how to configure the virtual services required. Note that depending on your requirements, it won’t be needed to create all of them.
Create the Exchange virtual services #
Once an unit of RELIANOID is deployed and the first boot parameters are setup, please follow the instructions described below.
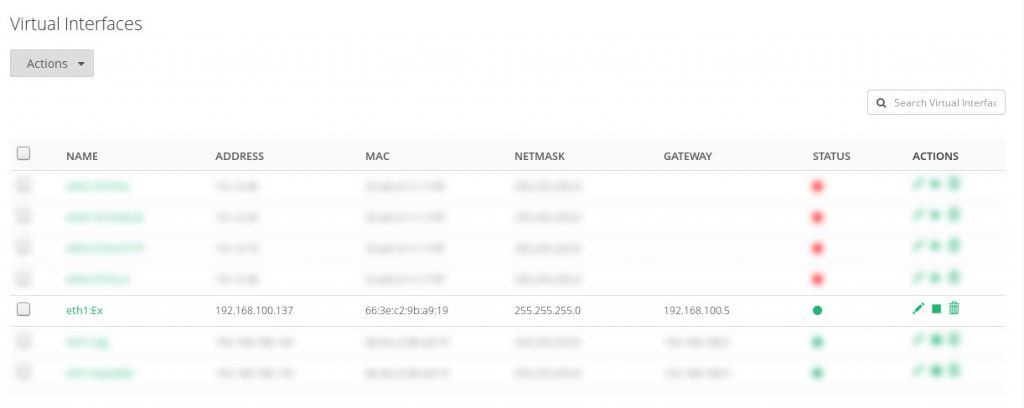
Firstly, create a dedicated virtual interface for Exchange services by entering in the menu section Network | Virtual Interfaces like it’s shown below.
This IP address will be the virtual IP for our Exchange services and it’ll be required that our corporate DNS resolve while querying exchange.mydomain.com .
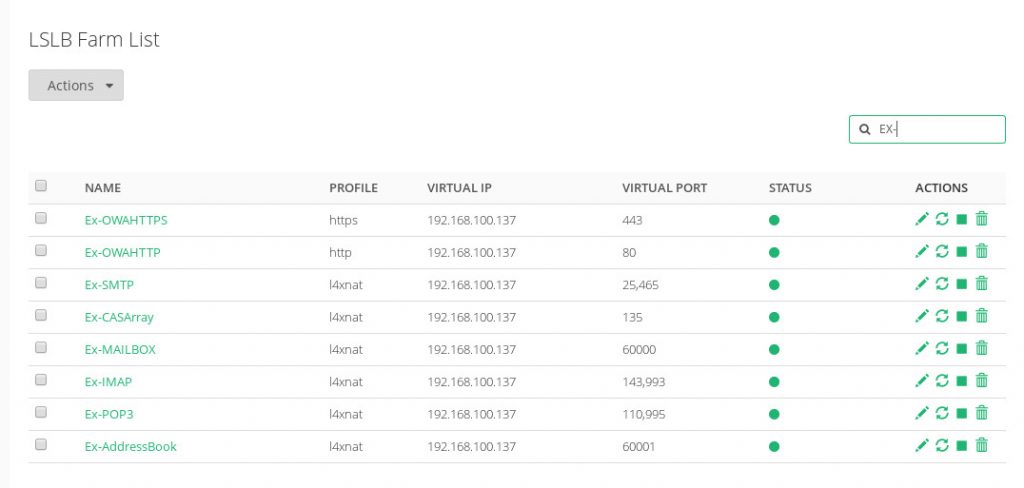
Then, the load balancer is ready to create the virtual services. Accessing to the menu section LSLB | Farms you can create all the load balancing farms proposed in order to isolate the different services of Exchange 2016, which will be described in the following sections in detail.
Create SMTP/S Virtual Service #
This is a LSLB farm with L4 profile that will be used as virtual mailing service which uses the TCP port 25 and 465 in the case that security is enabled in the backends.
In the Services section we can configure an advanced health check for SMTP.
check_smtp -H HOST -w 30 -c 30 -p 25 -t 32
If more than one port is used in the virtual service, it’ll be a good practice to test the different ports in just one health check.
Finally, configure the backends to be used as real servers for these services.
Create IMAP/S Virtual Service #
This is a LSLB farm with L4 profile that will be used to provide client connectivity to their mailbox via IMAP which uses the TCP port 143 and 993 in the case that security is enabled in the backends. Note that this is an optional service, please confirm if the Exchange 2016 enables the IMAP ports.
In the Services section we can configure a simple health check for IMAP like it’s shown below.
check_tcp -H HOST -p 143 -w 30 -c 30 -t 32
If more than one port is used in the virtual service, it’ll be a good practice to test the different ports in just one health check.
Finally, configure the backends to be used as real servers for these services.
Create POP3/S Virtual Service #
This is a LSLB farm with L4 profile that will be used to provide client connectivity to their mailbox via POP3 which uses the TCP port 110 and 995 in the case that security is enabled in the backends. Note that this is an optional service, please confirm if the Exchange 2016 enables the POP3 ports.
In the Services section we can configure a simple health check for POP3 like it’s shown below.
check_tcp -H HOST -p 110 -w 30 -c 30 -t 32
If more than one port is used in the virtual service, it’ll be a good practice to test the different ports in just one health check.
Finally, configure the backends to be used as real servers for these services.
Create RPC CAS Mailboxes Virtual Service #
This is a LSLB farm with L4 profile that will be used for mailbox service which uses the TCP port that was fixed in a previous step, in our example it’ll be 60000.
In the Services section we can configure a simple health check for this service like it’s shown below.
check_tcp -H HOST -p PORT -w 30 -c 30 -t 32
Finally, configure the backends to be used as real servers for these services.
Create Outlook Address Book Virtual Service #
This is a LSLB farm with L4 profile that will be used for address book services which uses the TCP port that was fixed in a previous step, in our example it’ll be 60001.
In the Services section we can configure a simple health check for this service like it’s shown below.
check_tcp -H HOST -p PORT -w 30 -c 30 -t 32
Finally, configure the backends to be used as real servers for these services.
Create CAS Array Virtual Service #
This is a LSLB farm with L4 profile that will be used for CAS Array services which uses the TCP port 135 by default.
In the Services section we can configure a simple health check for this service like it’s shown below.
check_tcp -H HOST -p PORT -w 30 -c 30 -t 32
Finally, configure the backends to be used as real servers for these services.
Create OWA Virtual Services with SSL Offloading #
This is the service to provide mail web access to the clients and it can be offered through the ports 80 and 443 TCP. In this case, we propose to use SSL offload in the load balancer, so the Exchange servers doesn’t have to deal with the web SSL load and only accepts connections in HTTP.
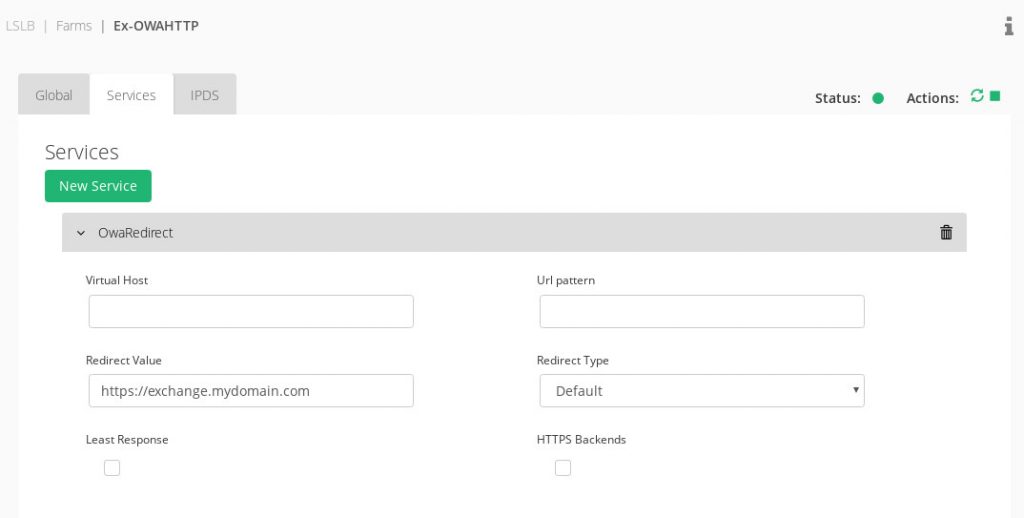
In order to build it, firstly we create a LSLB farm with HTTP profile in the port 80 and in the Services section configure the redirection to HTTPS as it’s shown below.
Note that we used the service domain, in our example will be exchange.mydomain.com . No need to insert backends, as all the traffic will be redirected to another secure farm.
Finally, restart the new farm in order to apply the changes.
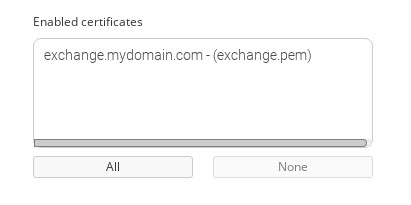
Then, create a new one LSLB farm with HTTP profile and HTTPS listener in the port 443 with the same certificate used in the Exchange CAS Array services converted to PEM format. And then add it in the service like it’s shown below.
Finally, configure the advanced health check and add the backends servers connecting to the port 80.
check_http -H HOST -S -w 10 -c 10 -t 11 -u /owa/healthcheck.htm --expect='200'
Restart the service in order to apply the changes.
Exchange 2016 in high availability and automated disaster recovery configuration #
It is required that once we have all the services load balanced and in high availability, to avoid the single point of failure in the case that the load balancer goes down or due to maintenance tasks.
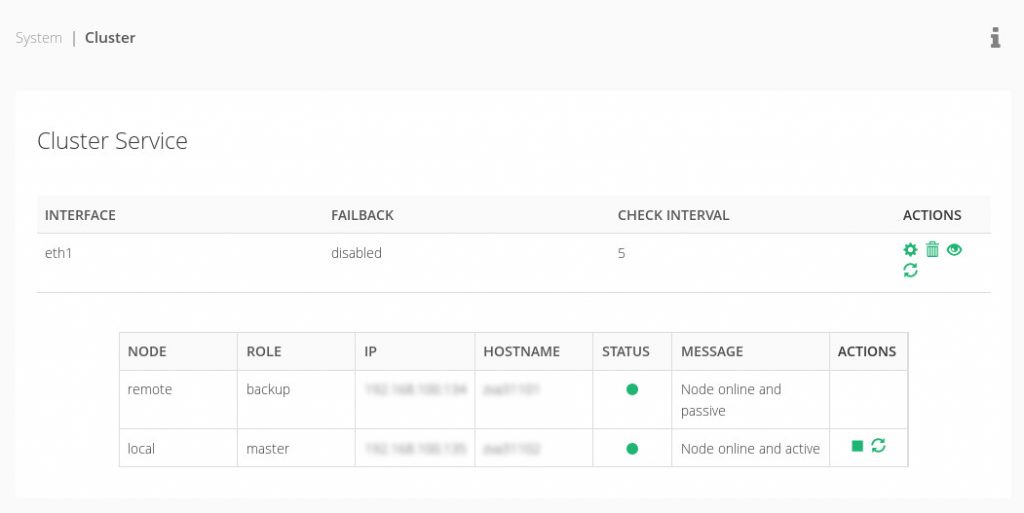
As the RELIANOID clustering solution replicates all the connections and sessions in real time, building a cluster the clients can transparently switched from one node to another without disruption. The cluster service provides high availability at application delivery layer but also an automatic disaster recovery abilities that can be configured easily through the section System | Cluster.
Exchange 2016 enhanced security #
RELIANOID Intrusion Prevention and Detection System adds an additional security layer to the Exchange services, so we can ensure that the connection requests from our sites are trusted. We recommend to enable this module if any of our virtual services are public on the Internet.
Enjoy your highly available Exchange services!
Some references used in this article:
https://docs.microsoft.com/en-us/exchange/plan-and-deploy/deployment-ref/network-ports?view=exchserver-2019
https://sysadminblogger.wordpress.com/tag/zen-load-balancer-exchange-2016/
https://sysadminblogger.wordpress.com/tag/zevenet-load-balancer-exchange-2016/
http://josemct.com/blog/2016/06/22/client-access-server-cas-array-zen-load-balancing/
https://blogs.technet.microsoft.com/exchange/2015/10/08/load-balancing-in-exchange-2016/
